Deeper Connect Pico Setup Guide
Virtual Wire Mode
Setup Step 1:
Pre-start Check: please ensure your network is working properly before setting up.

Setup Step 2:
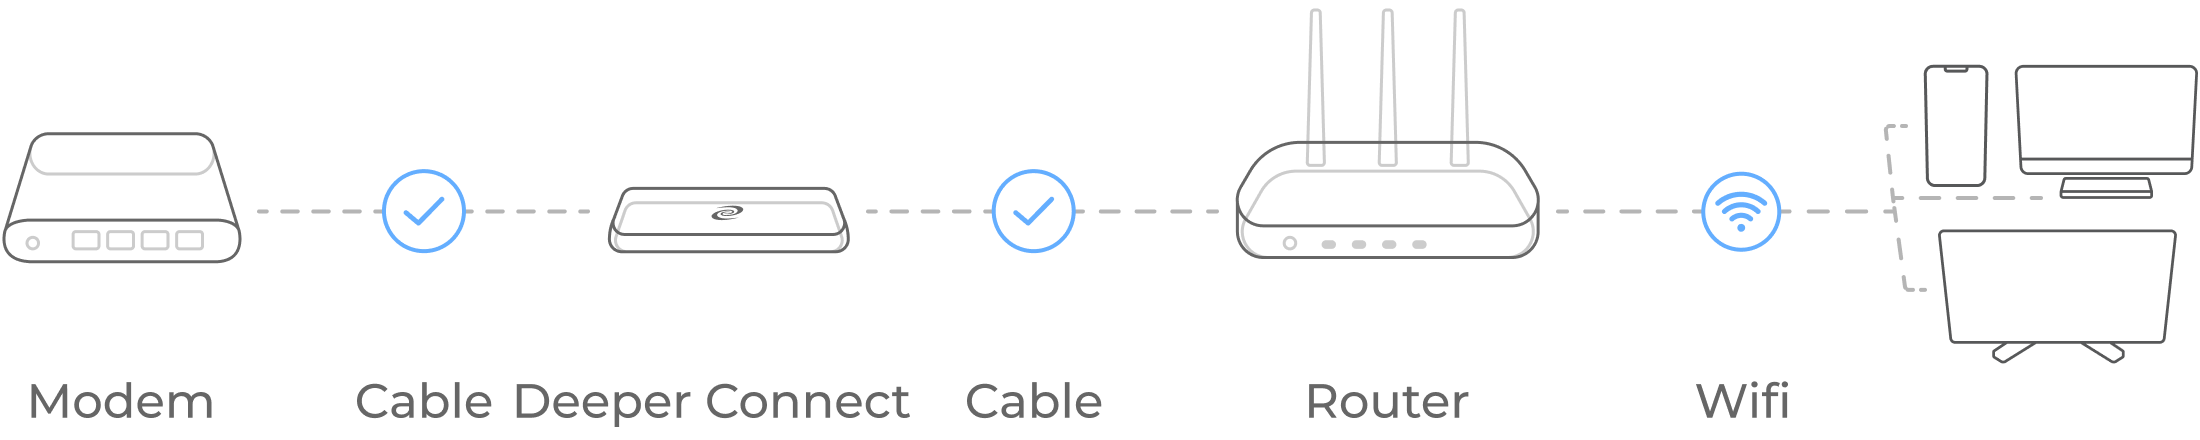
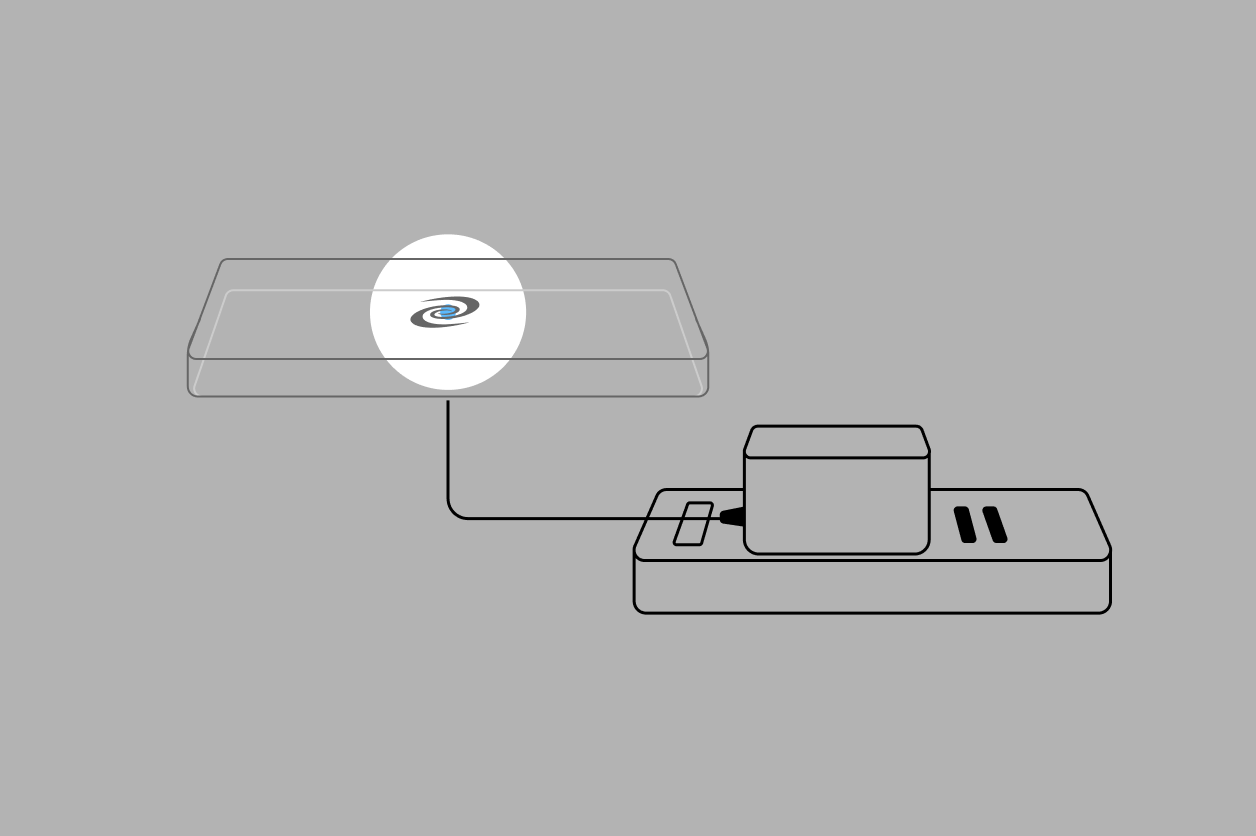
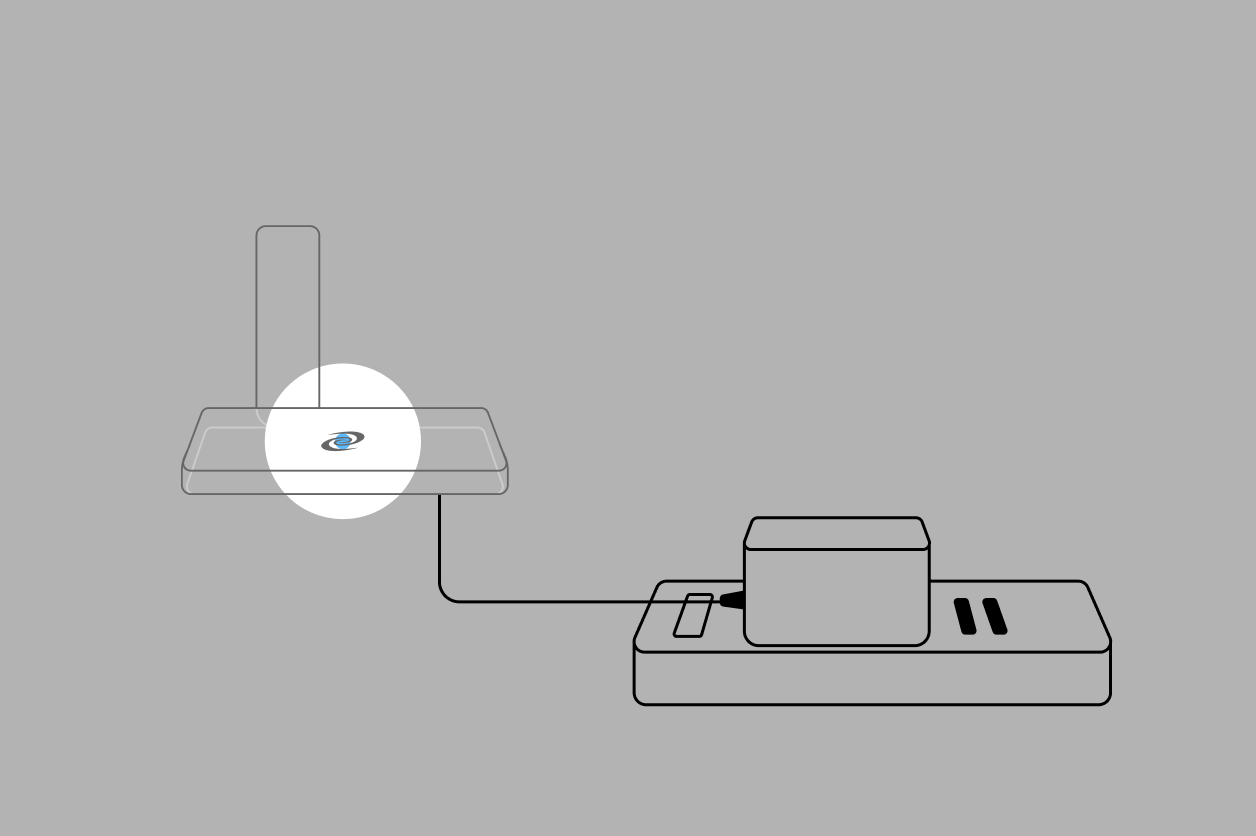
One side of the Pico connects to a modem, while the other side connects with a router via the included USB Type-C to RJ45 cables. Then, connect the USB Type-C to power up the Pico.

Setup Step 3:
The start-up process is around 60 seconds during which the indicator light will be flashing blue slowly.
Setup Step 4:
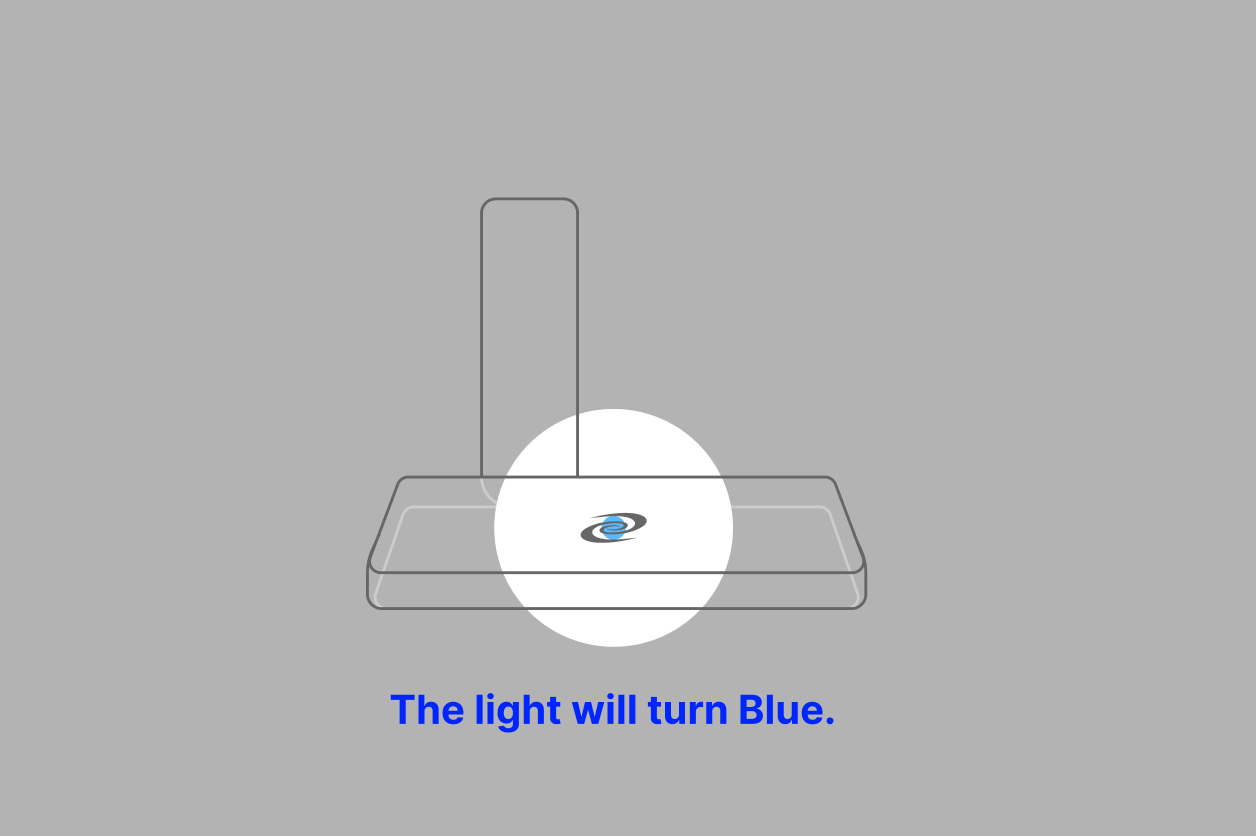
After start-up, the indicator light will turn from blue to red. Then after 30 seconds it will turn blue again.
This blue light indicates the network connection has been established. You can now access the internet.

Setup Step 5:
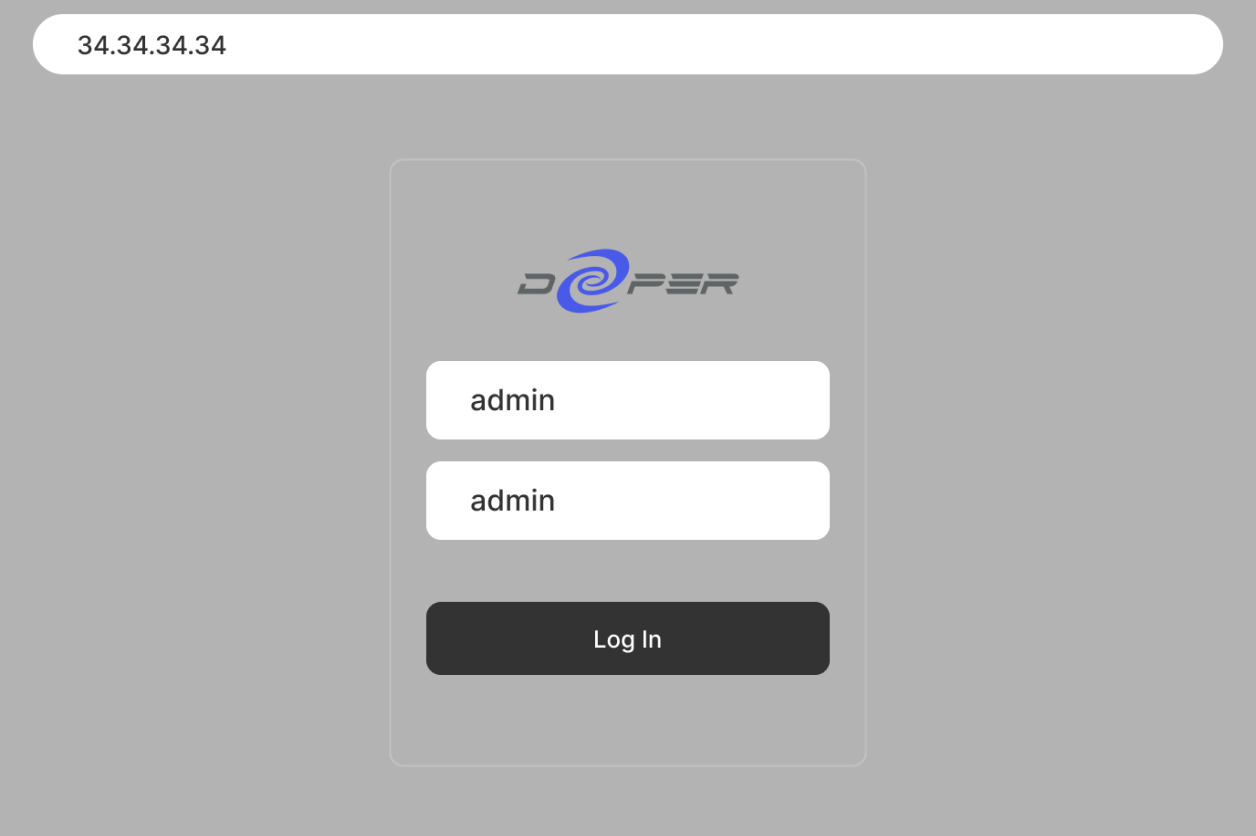
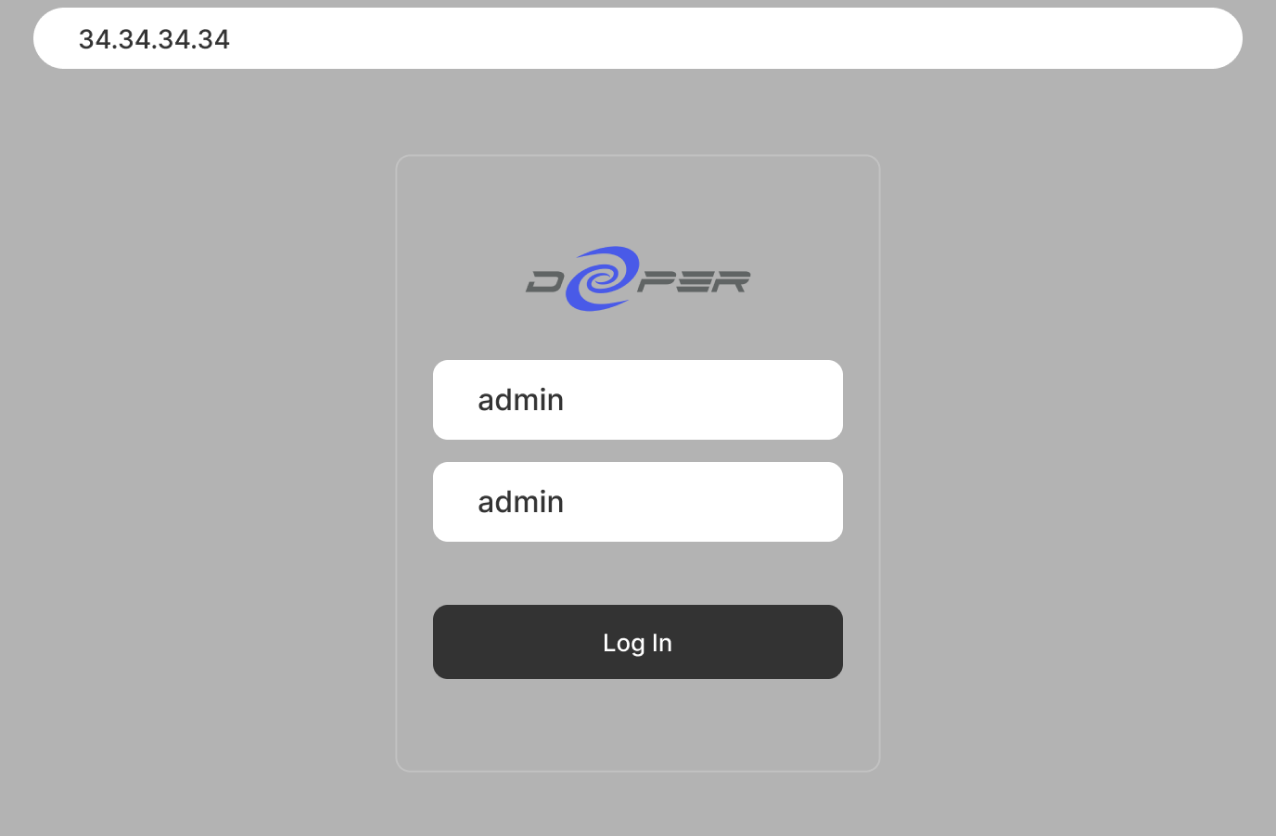
Once online, input 11.22.33.44 or 34.34.34.34 into your browser on your computer to access AtomOS.
The default username and password are both "admin".
Setup Step 6:
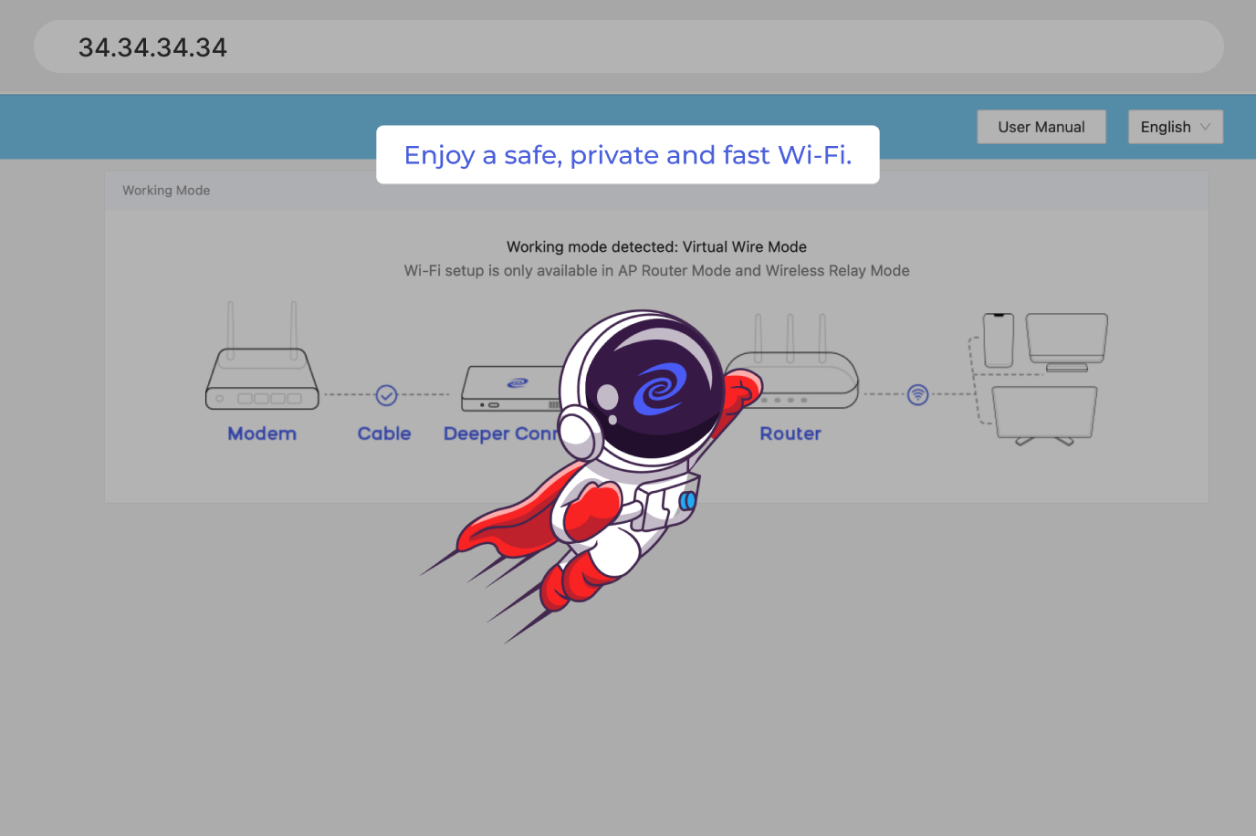
Congratulations, the installation is complete! You can now enjoy a safe, private and fast Wi-Fi.
Additional information:
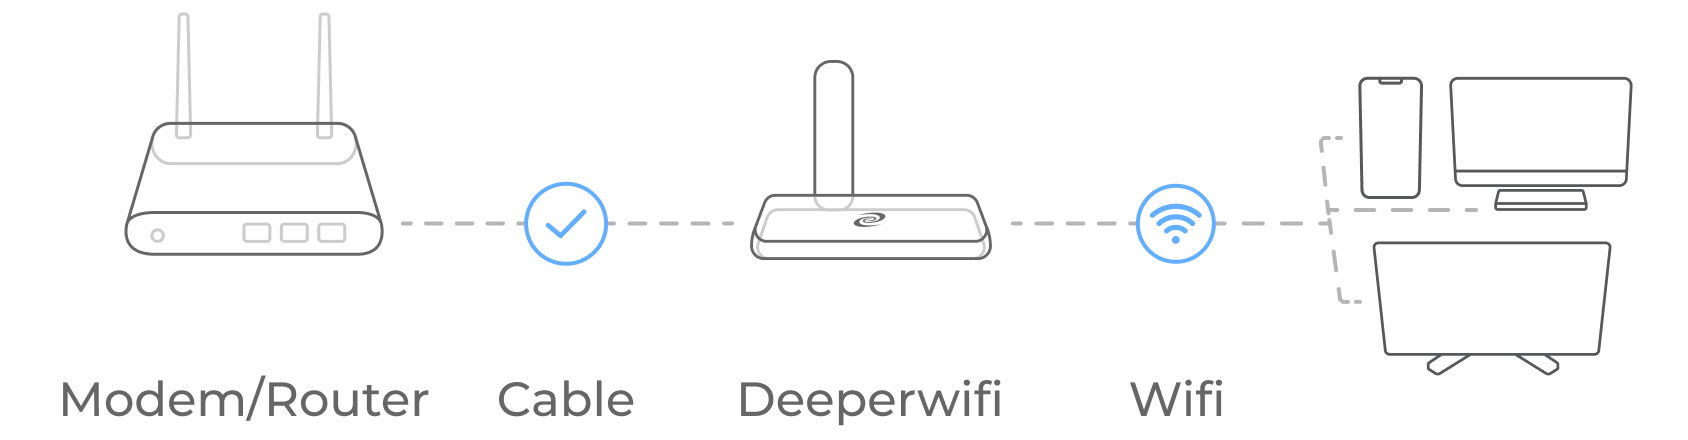
In Virtual Wire Mode, you can still directly utilize your existing Wi-Fi network to effortlessly access all the features of the Deeper Connect Pico.

Set Up Tutorial
Router Mode
Setup Step 1:
Pre-start Check: please ensure your network is working properly before setting up.

Setup Step 2:
Power on the Deeper Connect Pico via the side USB-C power port. The device will take about 60 seconds to start up. The indicator light will turn from blue to red.
Setup Step 3:
Connect the Pico to an integrated Modem/Router via the USB Type-C to RJ-45 cable. Next, plug in the included Wi-Fi Adapter into the side WiFi adapter port.

Setup Step 4:
Then, after a few moments, the indicator light will turn blue. This means the network has been established.
Setup Step 5:
Connect to your Deeper Wi-Fi. (Please first verify whether your device supports the 5GHz network frequency band. If your device does not support this frequency band, it may result in the inability to detect Wi-Fi signals.)

Setup Step 6:
Once online, input 11.22.33.44 or 34.34.34.34 into your browser on your computer to access AtomOS.(If 34.34.34.34 cannot be opened, try 168.192.1.1).
The default username and password are both "admin".
Setup Step 7:
Congratulations, the installation is complete! You can now enjoy a safe, private and fast internet connection.

Additional information:
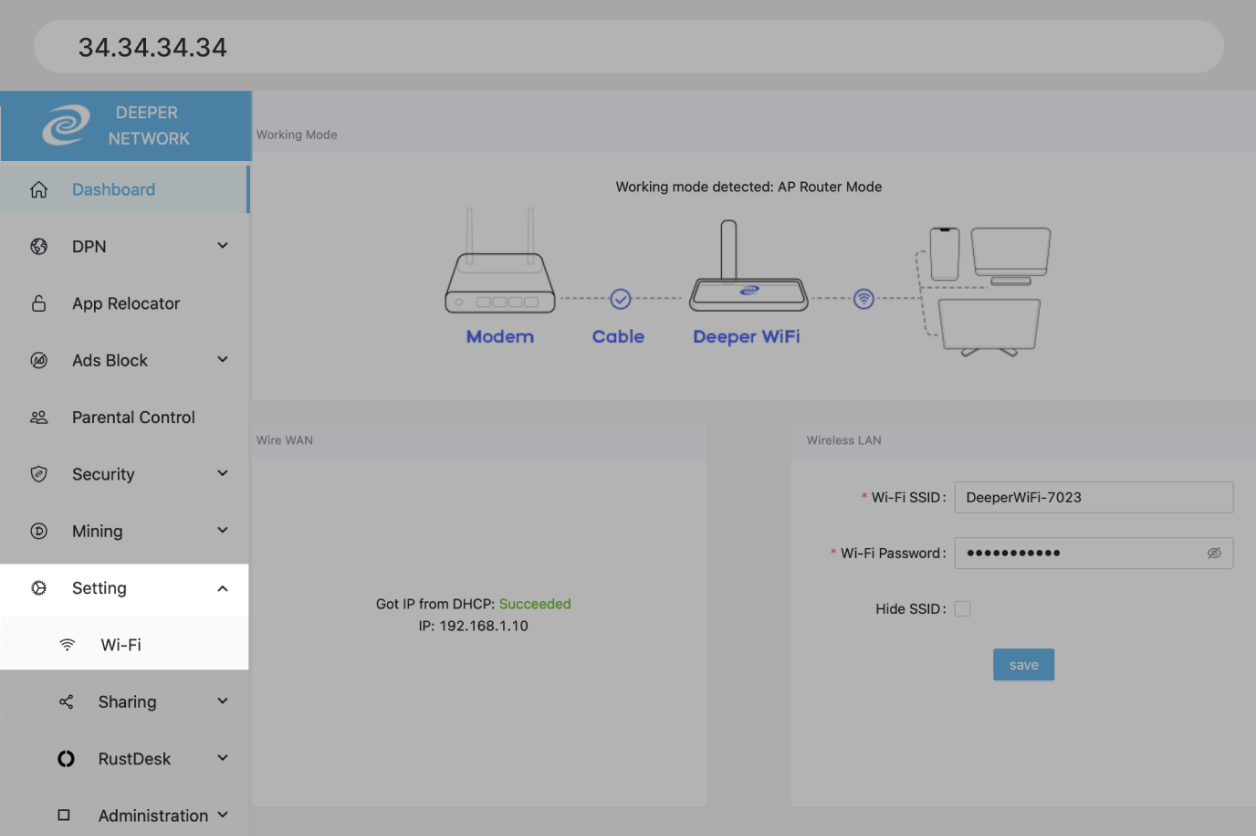
In Router Mode, you are required to connect to DeeperWi-Fi in order to fully utilize all the features of the Deeper Connect Pico.
If you need to set up Wi-Fi, please enter the "Setting" menu in the menu bar and select "Wi-Fi" to access more detailed options.
After removing a Wi-Fi dongle from a device that is in use, it's advised to wait a minimum of 10 seconds before reinserting it. Reconnecting too promptly could risk creating network issues.
Set Up Tutorial
Wireless Relay Mode

Setup Step 1:
Power on the Deeper Connect Pico via the side USB-C power port. The device will take about 60 seconds to start up. The indicator light will turn from blue to red.
Setup Step 2:
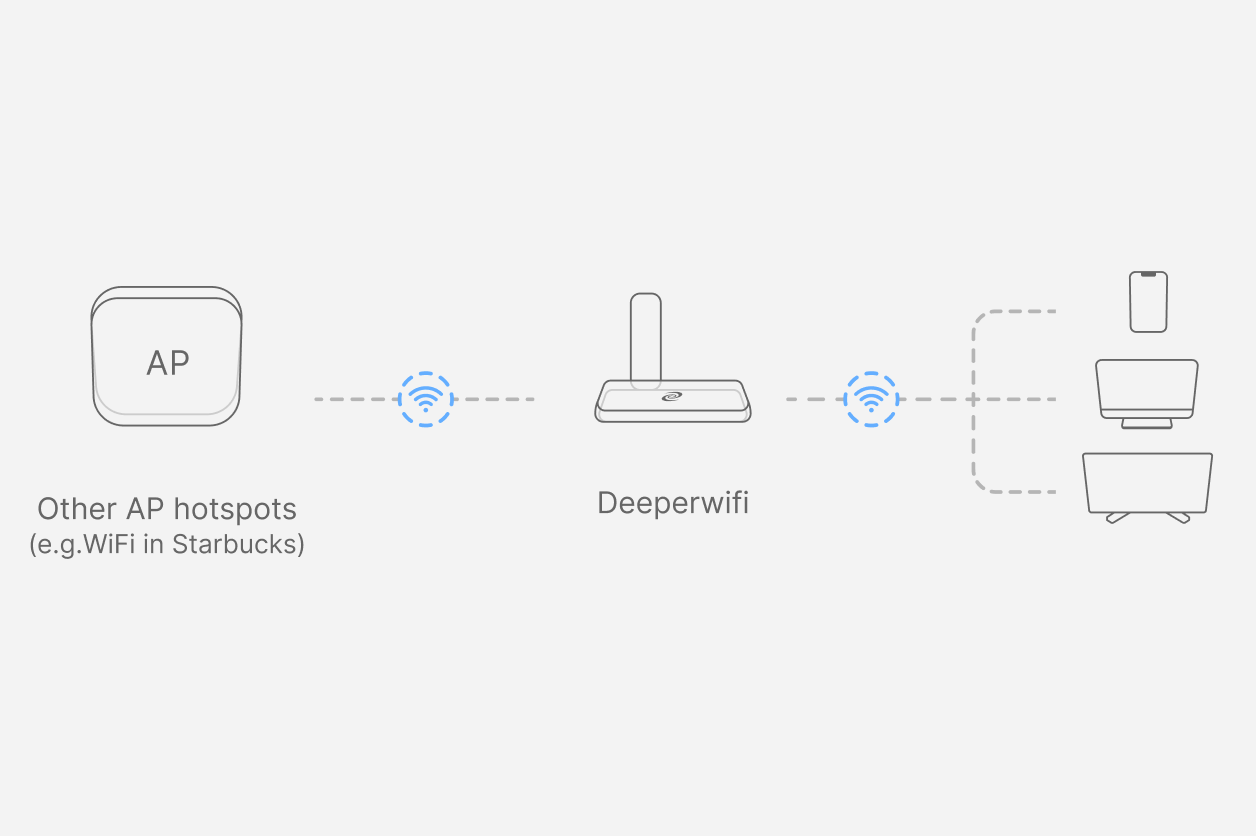
Plug in the included Wi-Fi Adapter into the side WiFi adapter port. After approximately 10 seconds, using a cell phone, laptop or tablet connect to the "deeperwifi" Wi-Fi network sent via the Pico.
The default password for this network is "ilovedeeper".

Setup Step 3:
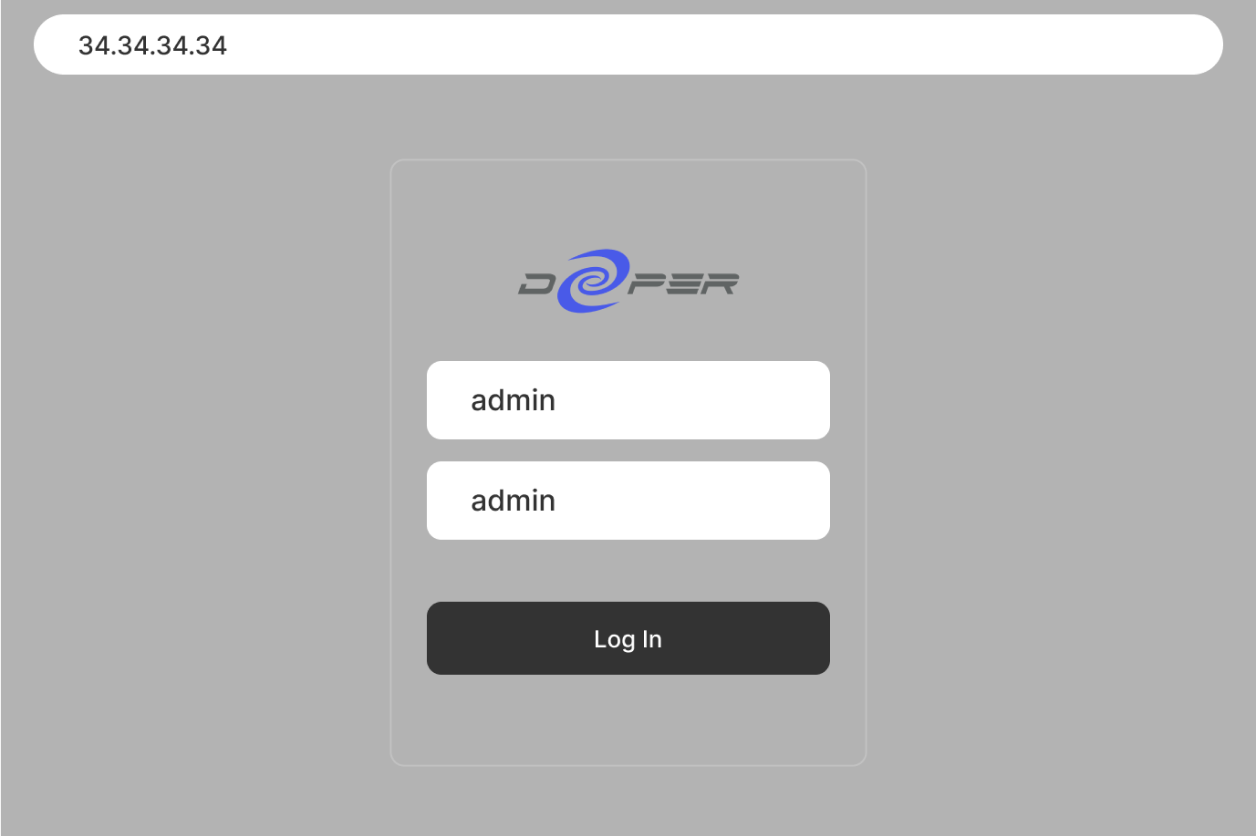
Open the browser and enter the website address "34.34.34.34" to access the AtomOS system.
(If 34.34.34.34 cannot be opened, try 168.192.1.1) Log in using the default username "admin" and password "admin".
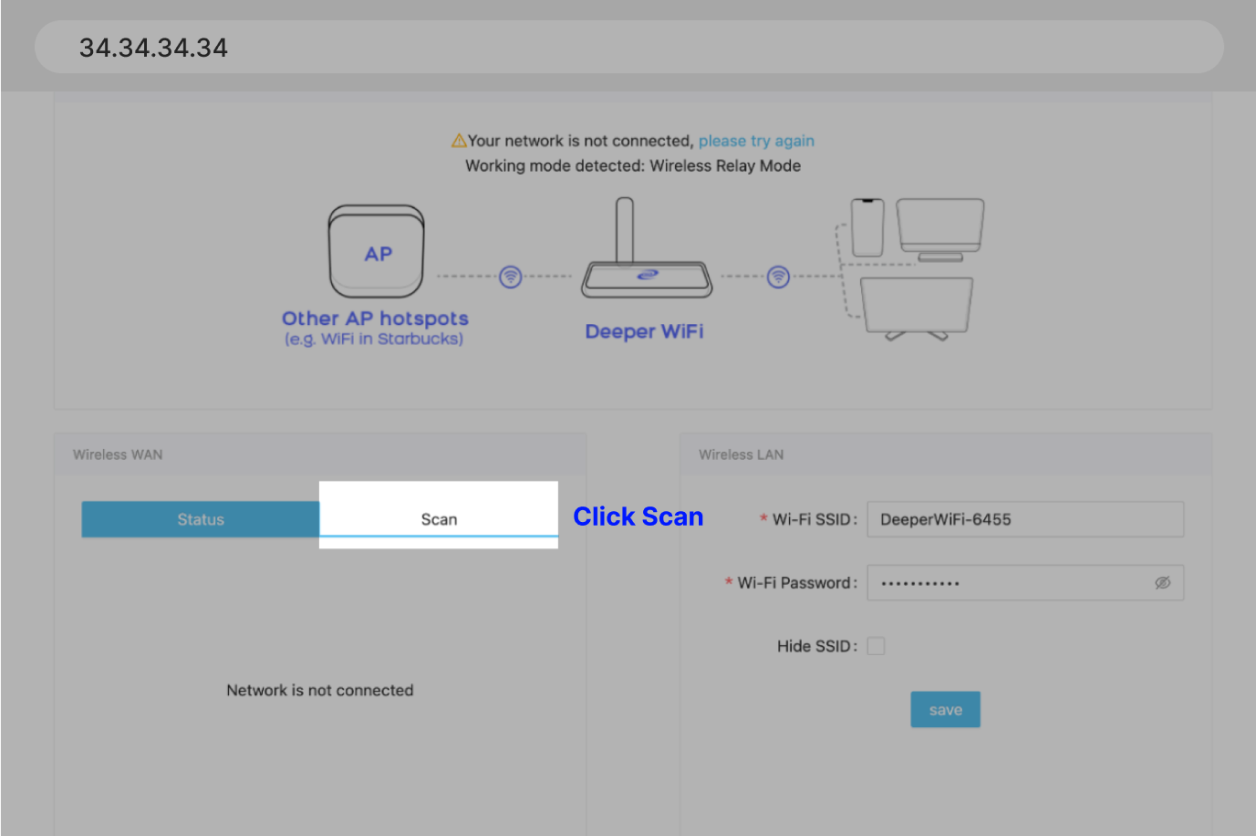
Setup Step 4:
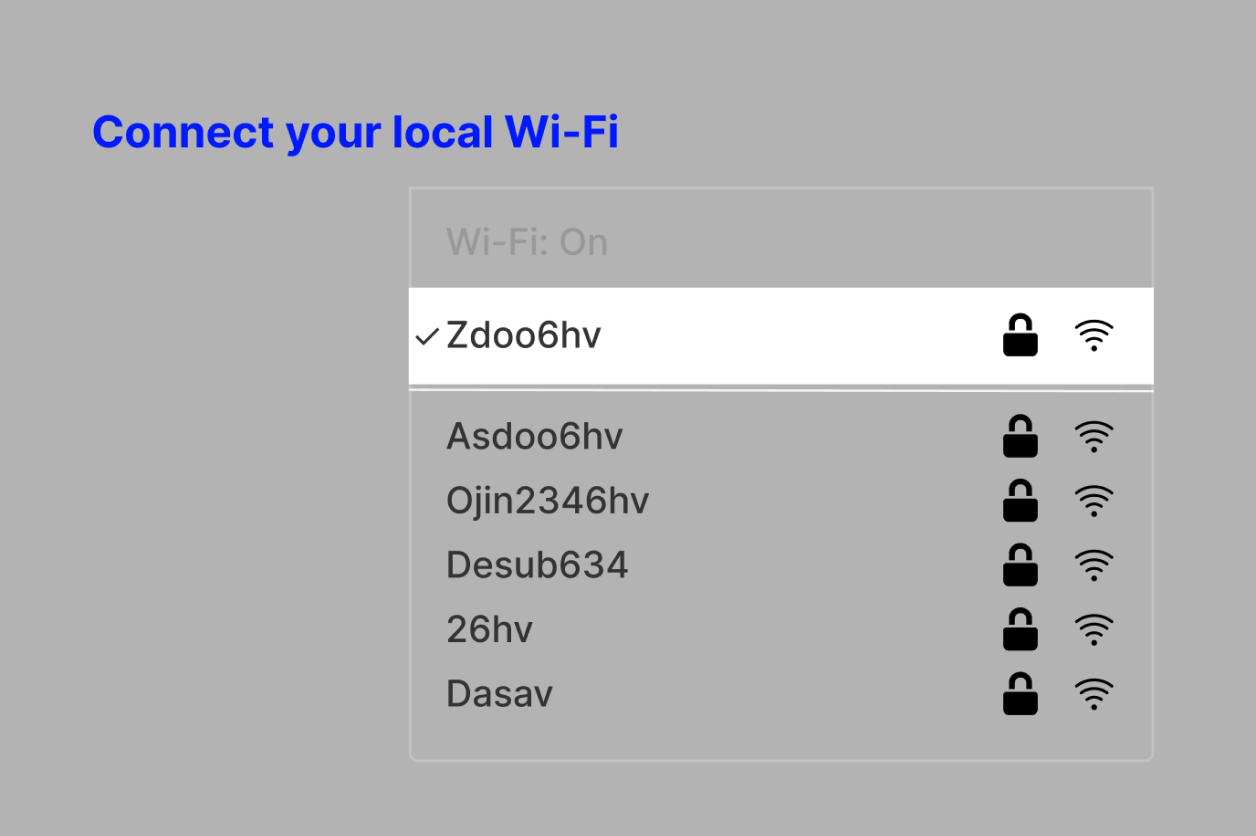
Click the "Scan" button to scan and find the target network.
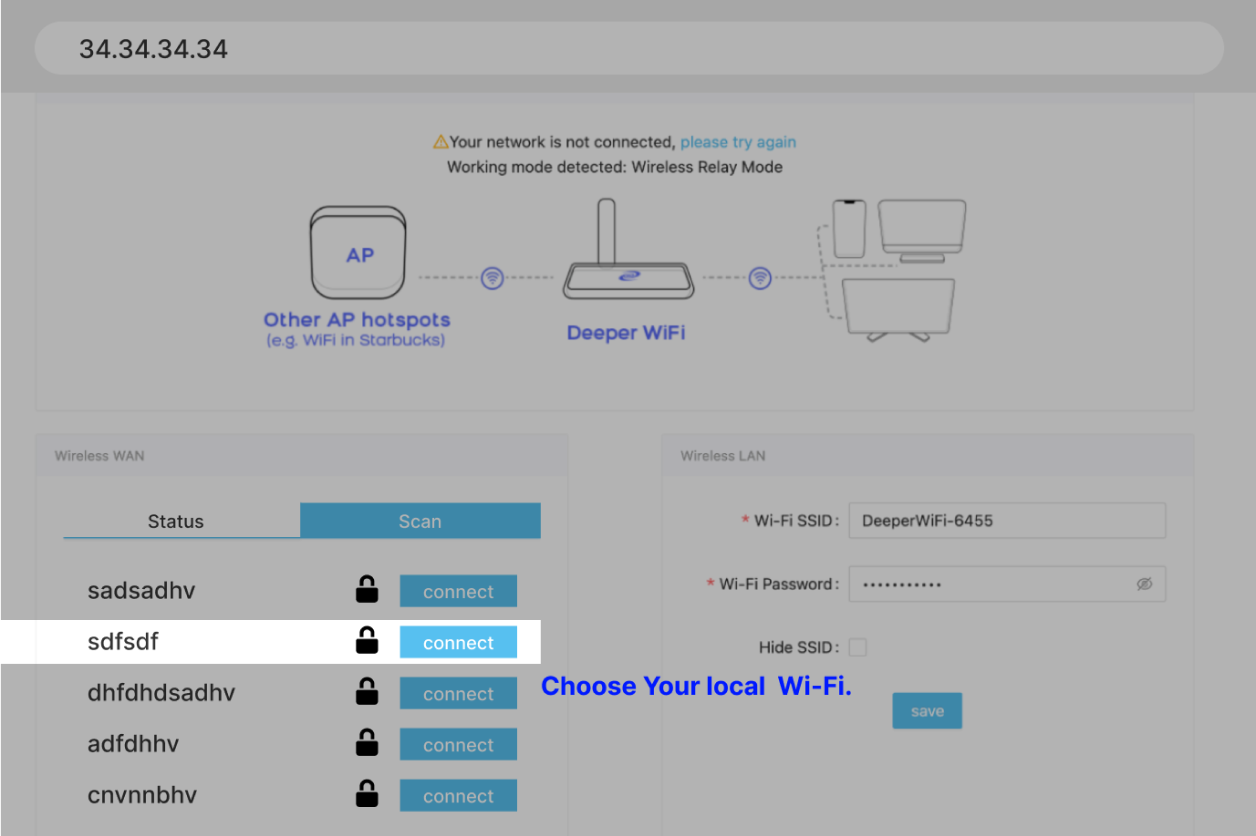
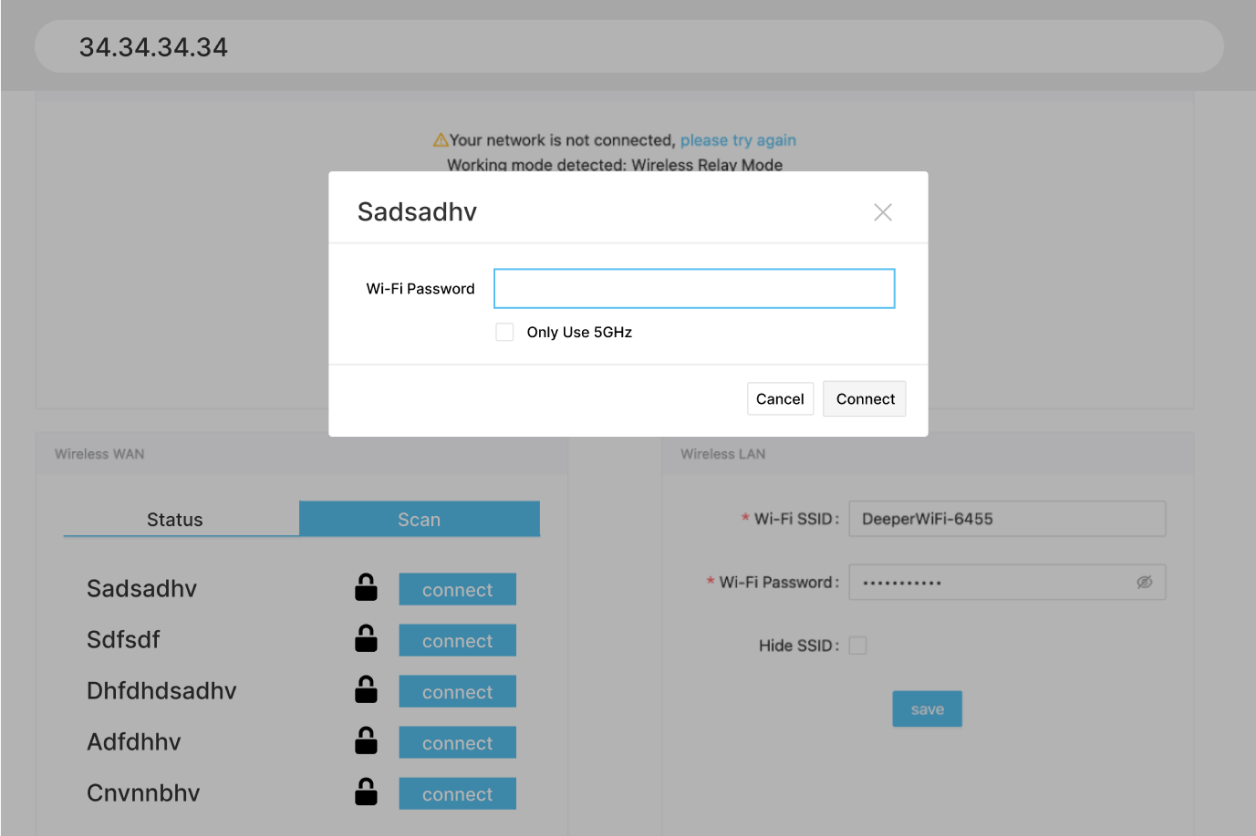
Setup Step 5:
In the Wi-Fi signal list, select the target network and click "Connect" to establish a connection.
Setup Step 6:
Once online, input 11.22.33.44 or 34.34.34.34 into your browser on your computer to access AtomOS.
(If 34.34.34.34 cannot be opened, try 168.192.1.1) The default username and password are both "admin".
Setup Step 7:
Congratulations, the installation is complete! You can now enjoy a safe, private and fast internet connection.

Additional information:
If you need to set up Wi-Fi, please enter the "Setting" menu in the menu bar and select "Wi-Fi" to access more detailed options.
Set Up Tutorial
Features Introduction
Geo-Unblocking


Ads Blocking
Smart VPN Router
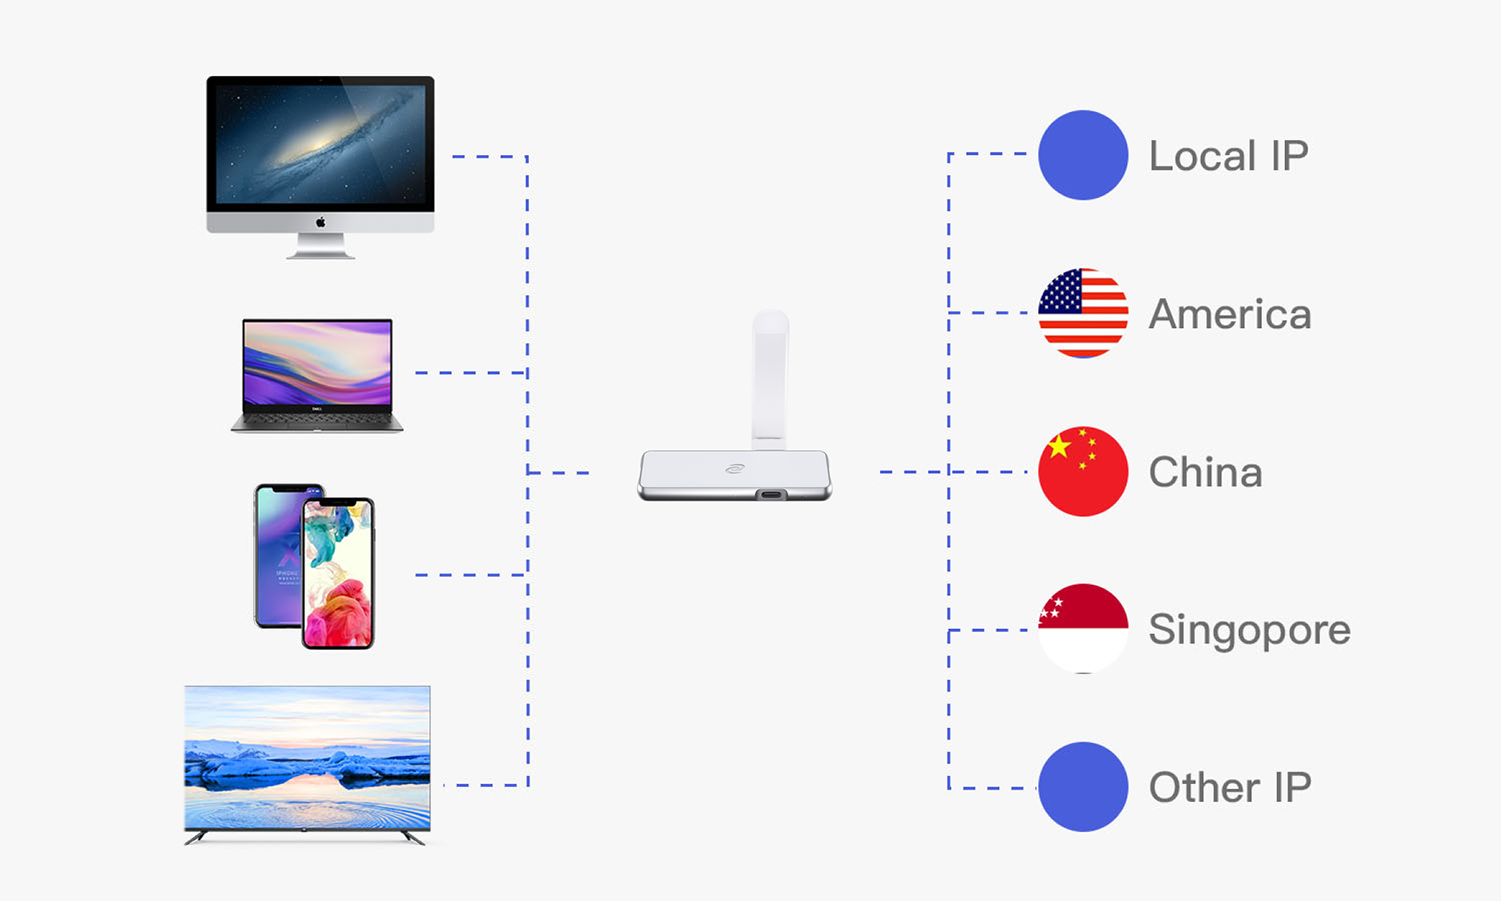

Save Money Online
Security & Privacy Protection

